Managing your Google Business Profile (GBP) posts just became smarter, faster, and easier!
Introducing the GBP Post Scheduler — your new all-in-one tool to plan, automate, and create AI-powered GBP posts that drive engagement while saving valuable time.
You can now seamlessly schedule Google Posts, generate content with AI, and publish to multiple social profiles directly from the Social Planner.
Key Improvements
Time-Saving Scheduling
- Plan your GBP content calendar weeks or months ahead.
- Easily schedule updates, offers, and events to go live exactly when your audience is most active — no more manual posting.
Effortless Bulk Posting
- Manage multiple locations or business profiles with one click.
- Publish to multiple Google Business Profiles simultaneously while maintaining brand consistency.
AI-Powered Content Creation
- Leverage built-in AI to generate compelling text and visuals based on your niche, audience, and competitor insights.
- Perfect for agencies looking to maintain creative consistency across multiple clients.
Boost Local Visibility
- Stay ahead in local search!
- Consistent, high-quality GBP posts can increase engagement, improve SEO visibility, and boost local rankings — helping your clients get discovered more often.

Why This Matters
- Save hours weekly by automating GBP post creation and scheduling.
- Let AI handle the creative heavy lifting — generate fresh, optimized posts in seconds.
- Manage all locations effortlessly with centralized bulk posting.
- Keep your Google listings active and engaging without constant manual updates.
How to Use the GBP Post Scheduler
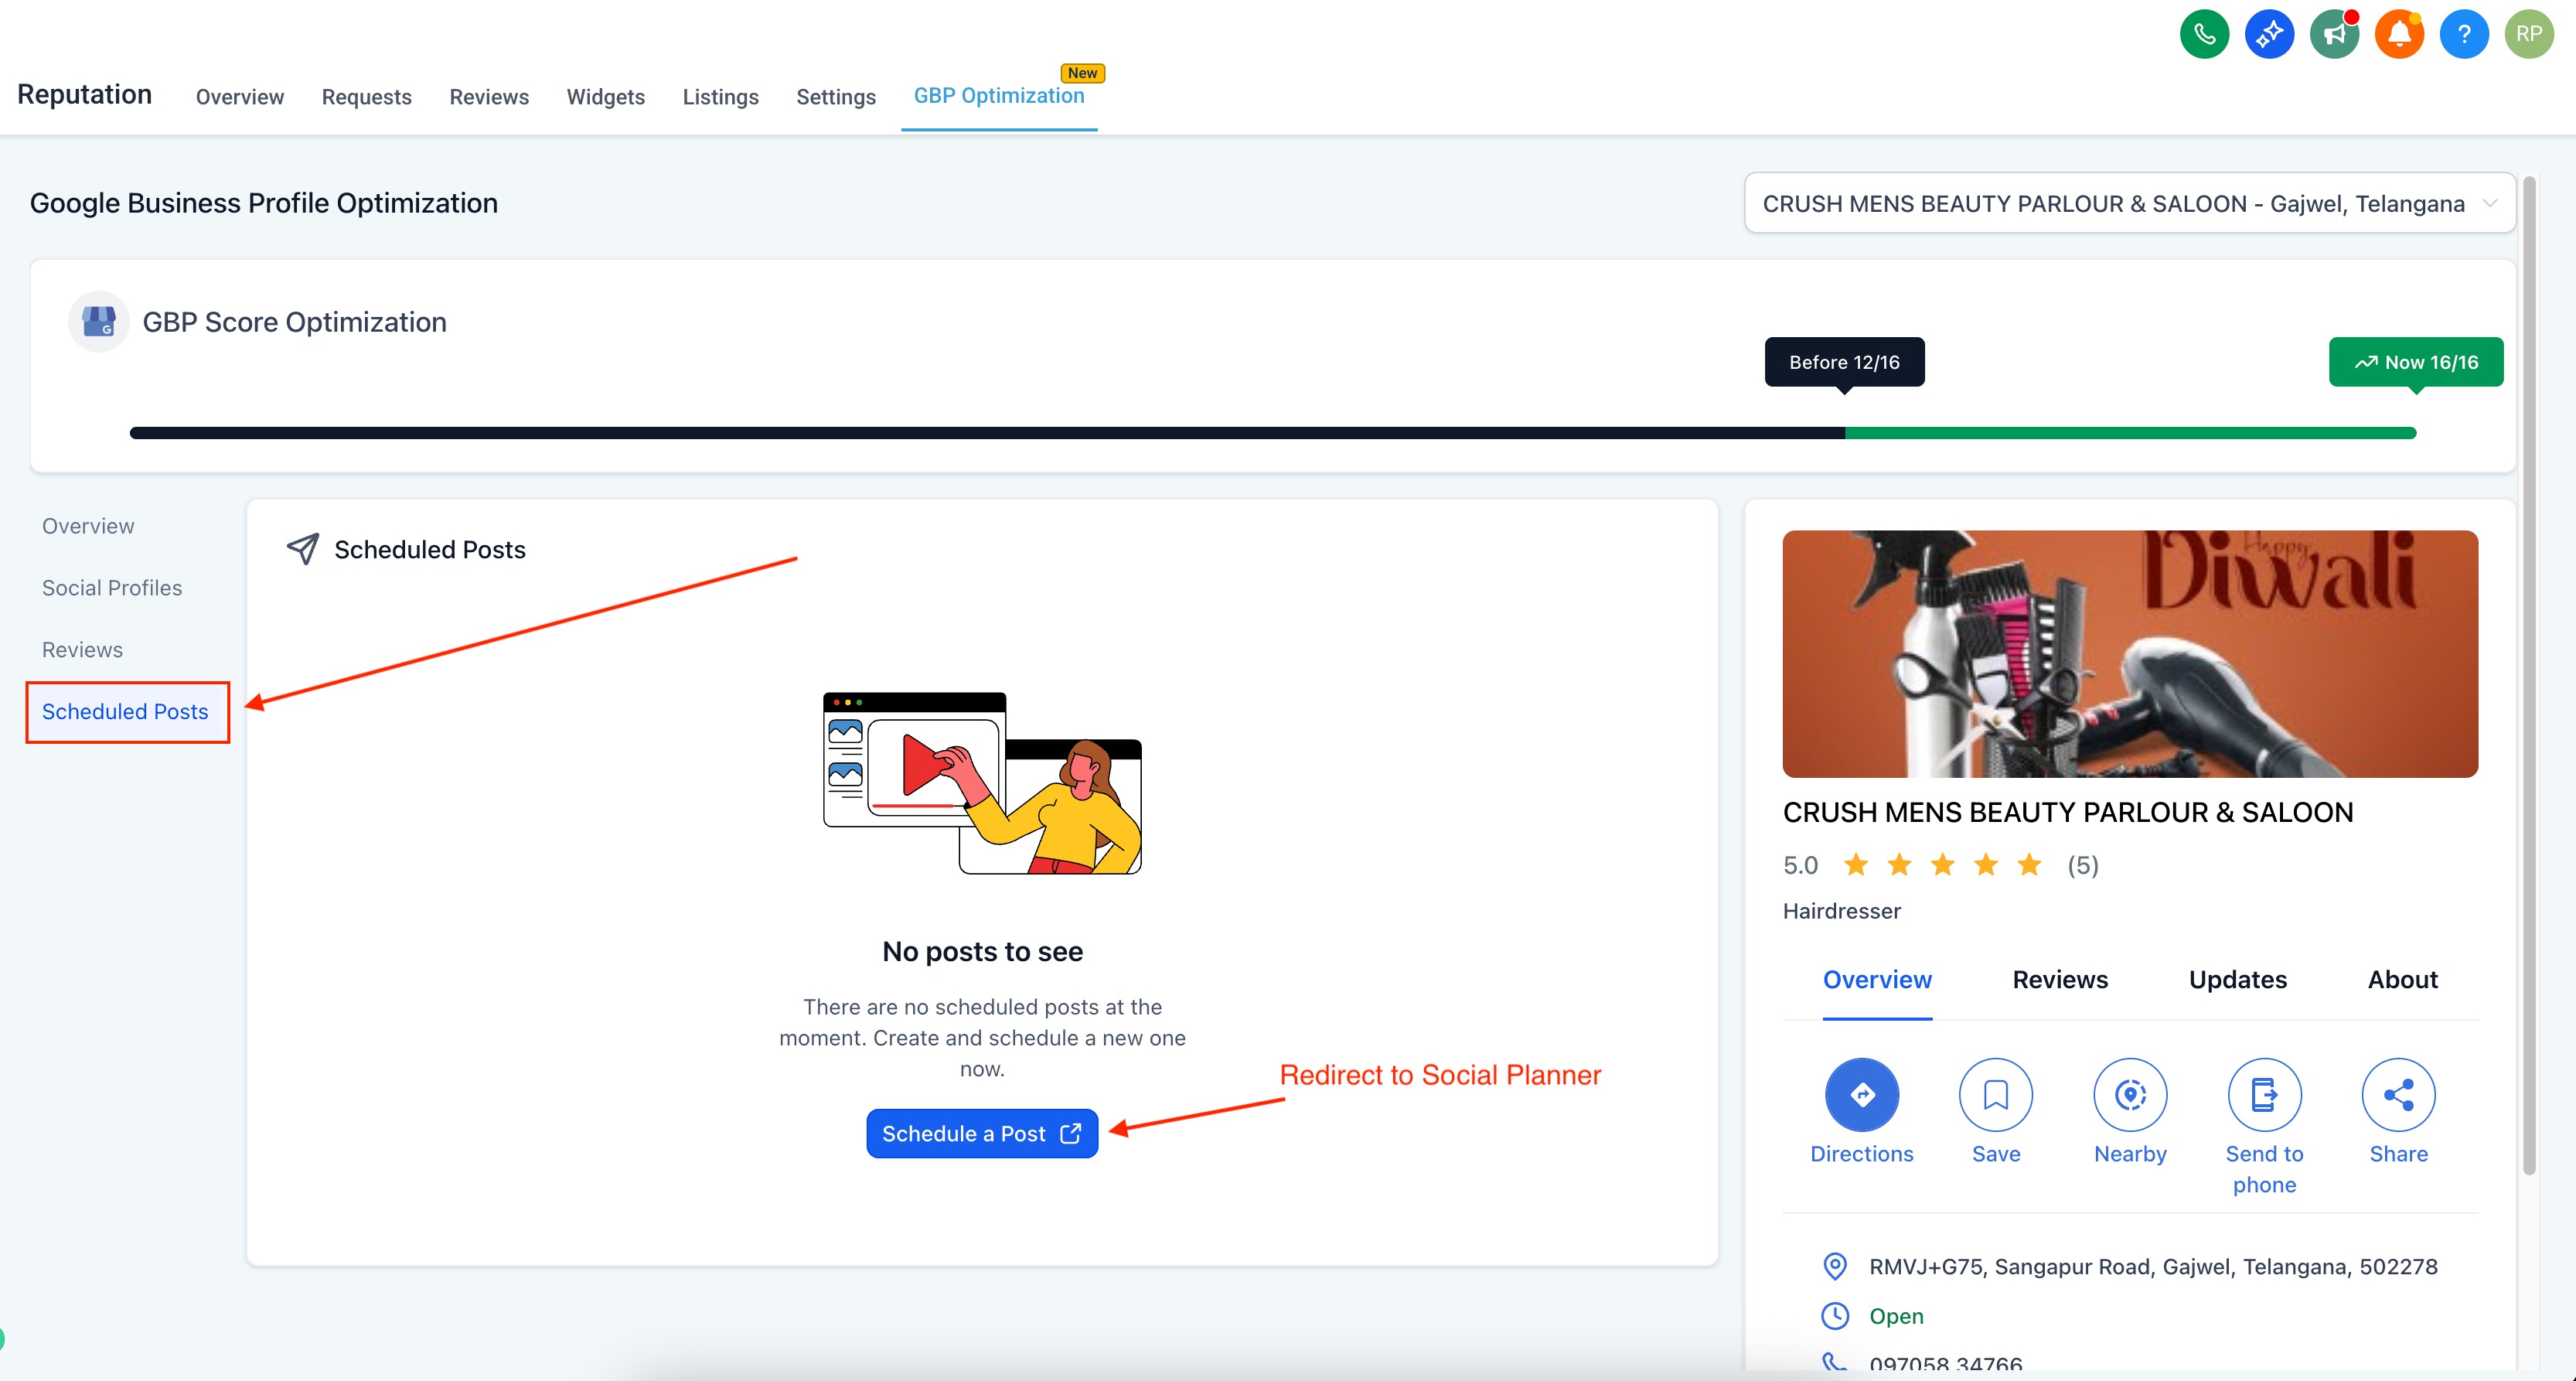
Step 1: Access the Scheduler
- Navigate to Reputation → GBP Optimization.
- Click on “Scheduled Posts” and select “Schedule a Post”.
Step 2: Connect Your Profiles
- Ensure your Google Business Profiles are connected via the Social Planner.
- Select one or multiple profiles for posting. Perfect for your account managing multiple locations.
Step 3: Create or Generate a Post
- Click “Create New Post”.
- Choose between Update, Offer, or Event types.
- Either write your own content or use AI Assist to instantly generate optimized copy and visuals.
Step 4: Schedule or Post Immediately
- Pick your desired date and time.
- Choose “Schedule” for later or “Post Now” for instant publishing.
Step 5: Track & Manage
- View your scheduled posts in the main GBP Optimization dashboard.
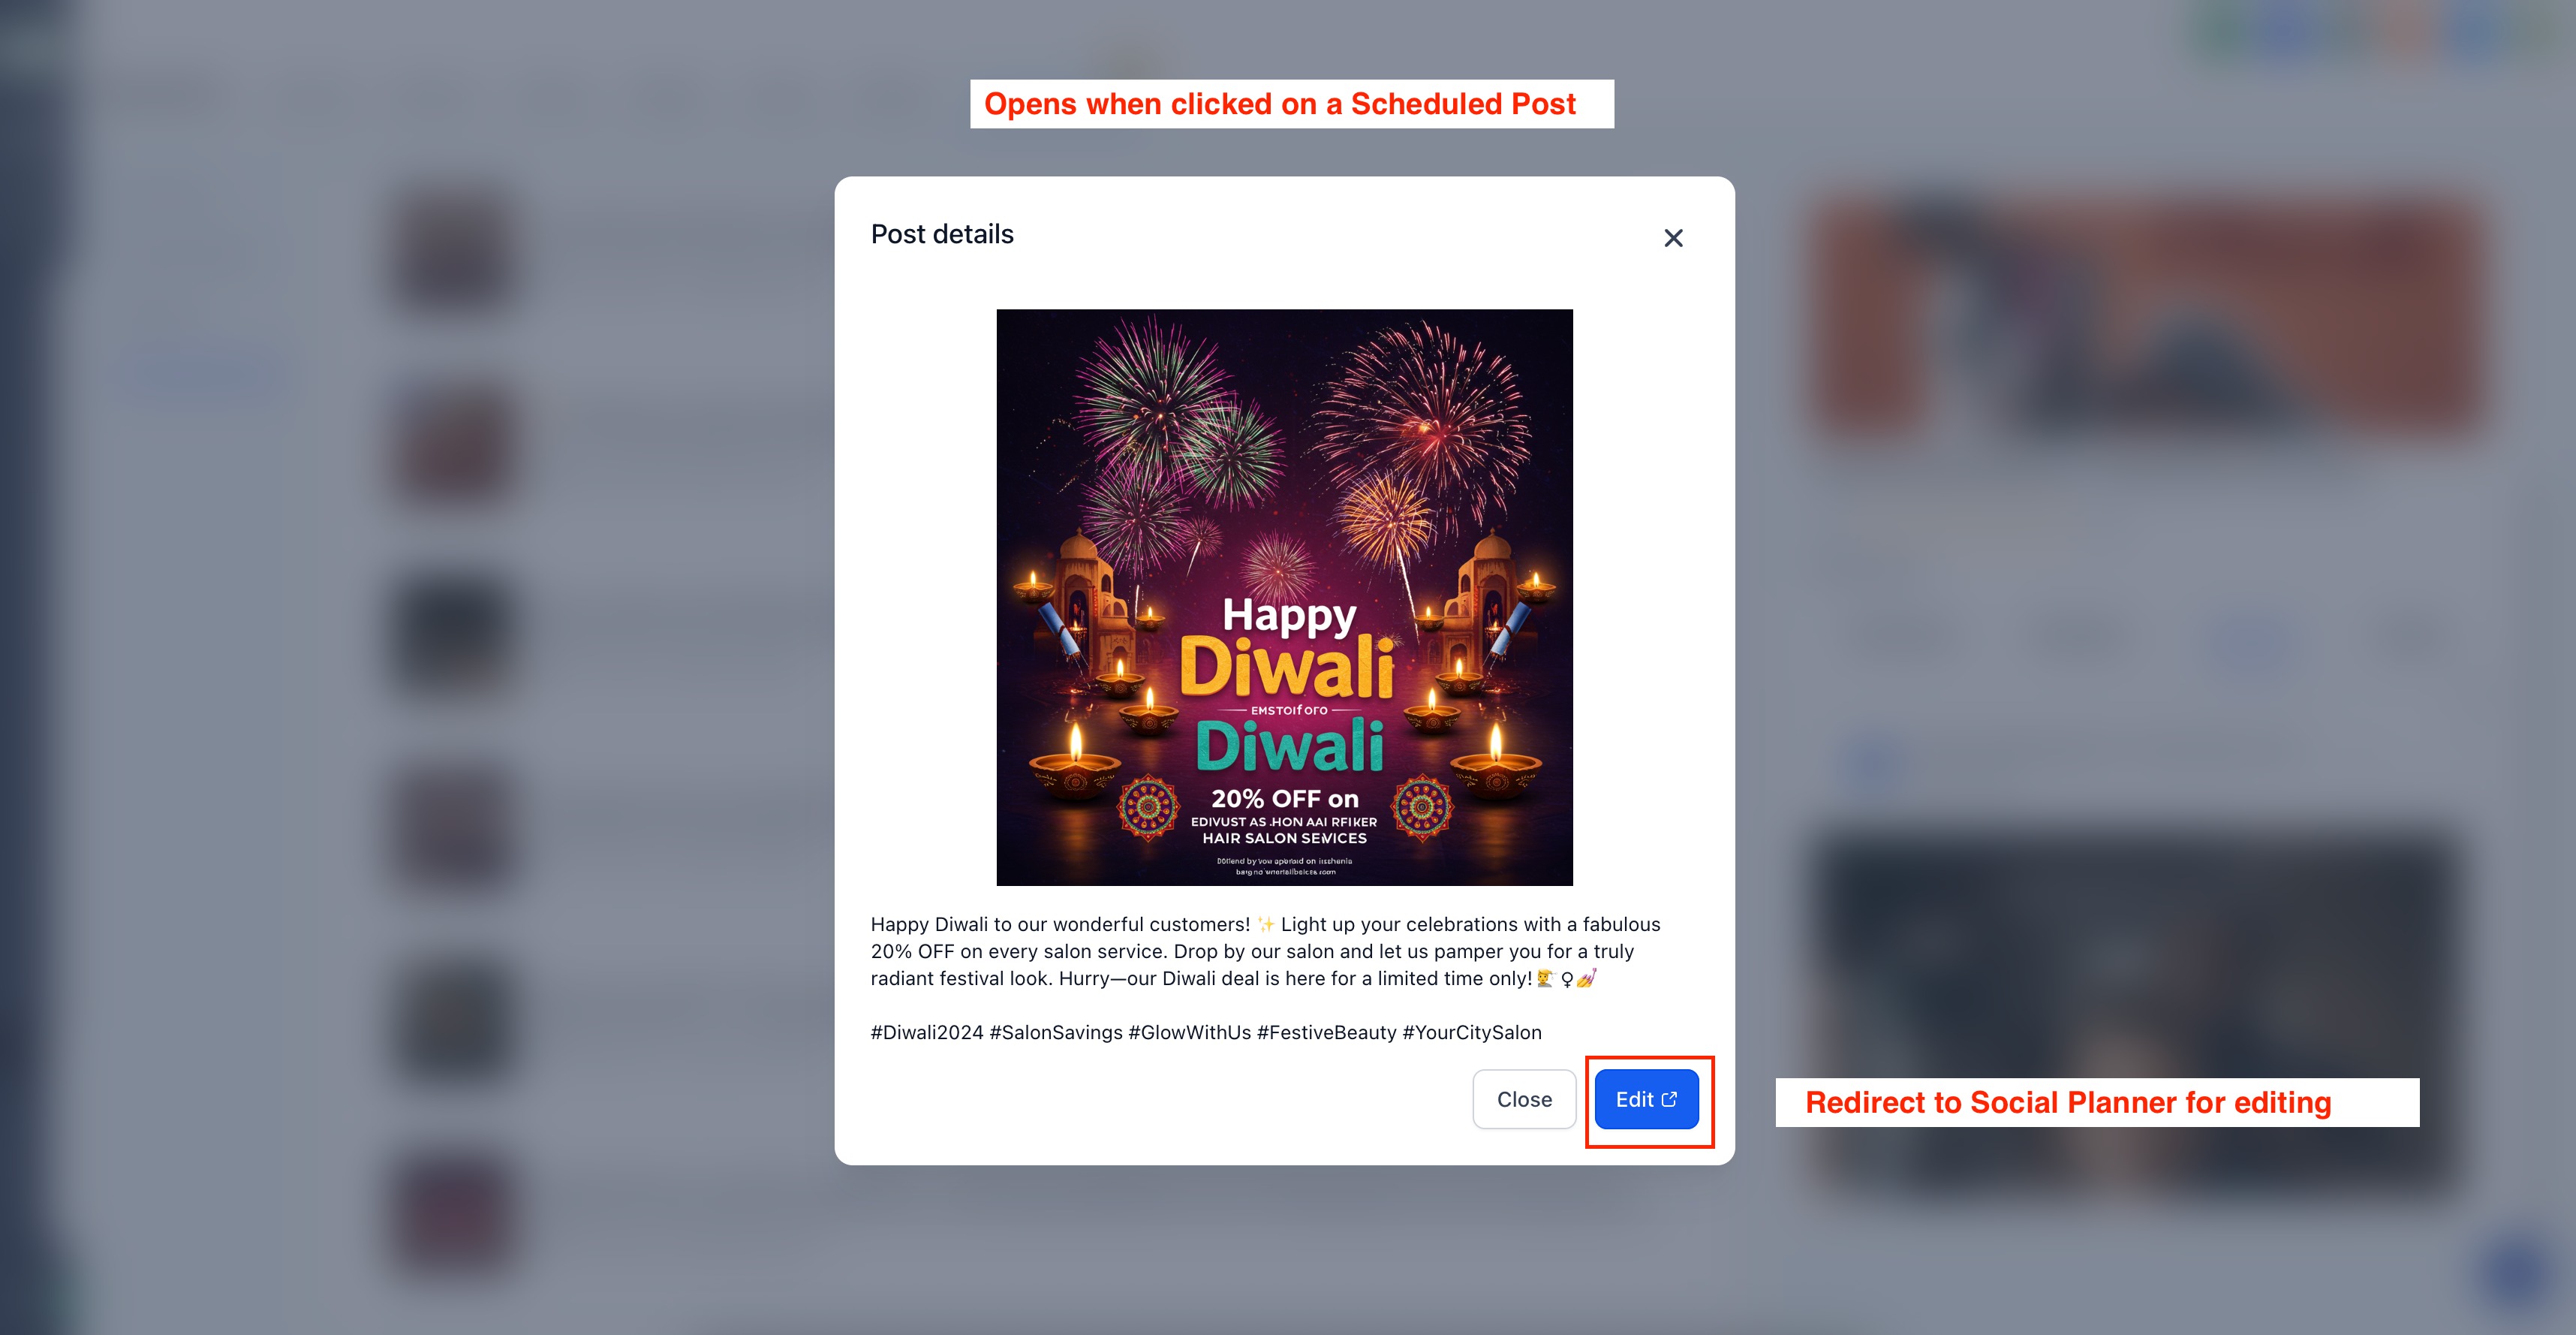
- Once published, find them under Preview → Updates Tab.
- Edit, reschedule, or delete upcoming posts anytime.
Was this article helpful?
That’s Great!
Thank you for your feedback
Sorry! We couldn't be helpful
Thank you for your feedback
Feedback sent
We appreciate your effort and will try to fix the article